- Deploying to Azure – part 1, Creating a build pipeline
- Deploying to Azure – part 2, Getting started with Azure hosting
- Deploying to Azure – part 3, Deploying the site
- Deploying to Azure – Part 4, Adding a custom domain
- Deploying to Azure – Part 5, Continuous delivery

In the previous post in this series I created a build pipeline in DevOps. In this post I dive into Azure hosting.
I decided to take the plunge into Azure hosting since you get 12 months free (well… maybe not – see below). It also seems to be be the way the development world is going, so I’d better jump on the band wagon.
I started by creating a free Azure account. (A credit card is needed but assured that it will not be charged unless you upgrade).
I started by creating an Azure account. Once logged in to my new account, Azure suddenly got even scarier! As big as it had seemed from the outside, once I saw the dashboard and customisable options it looked like a nightmare.
No backing out now though. Now I needed to set up a database for my app. I’ll leave the reader to find out the difference between all the options, but I chose the SQL Database not the Azure SQL.
When setting it up you can’t use a free account, and therefore need to upgrade. It works with pay as you go with the lowest option being estimated at £7 per month. I go for that and hope that it wont get used too much…
Next up I need to connect the app to the new Azure database. Switching back to Visual Studio I head over to add a connected service, select Azure SQL database, sign in to Azure and select the subscription.
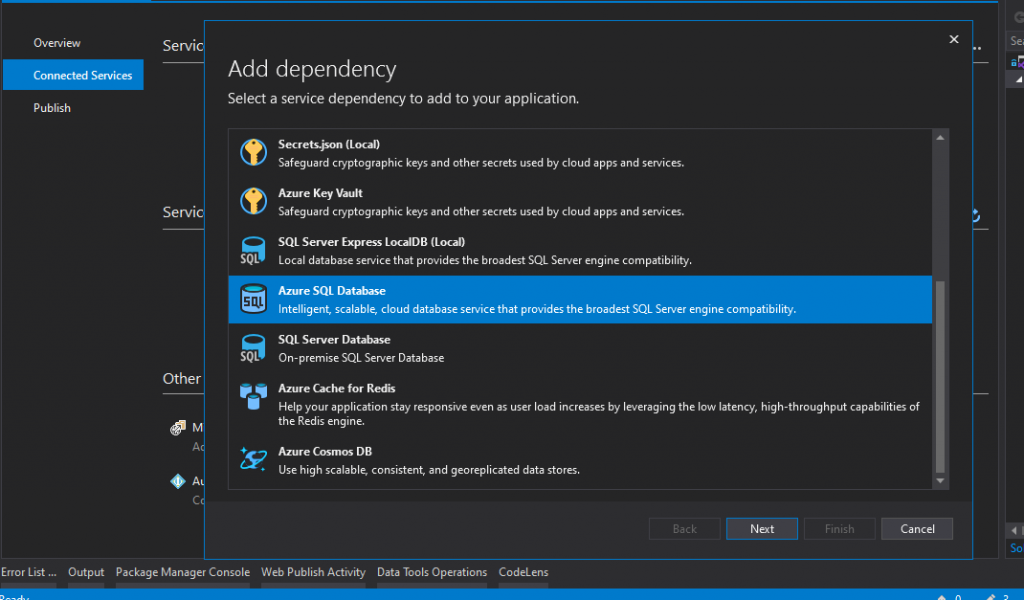
VS automatically adds the necessary JSON files to the app. Now when running the app, the new database is selected instead of any other detailed in appsettings.
This was great until I wanted to switch back to my local database for developing. The connection strings saved in appsettings are ignored and the Azure secrets are always used.
Eventually I worked out that we can finally get rid of the connection strings in appsettings altogether.
This is good news since I always felt that it wasn’t secure to have them stored in plain text. Anyone that has access to the server for maintenance etc is privy to the connection strings. That is besides having to have a separate connection string for development and production which means two files; one locally and one only for the published app running live.
(You can actually get around this as we’ll soon see – supposedly though appsettings.Development is supposed to be the answer to this. This file is supposed to hold all the configuration for the development stages and in production only the appsettings file would be on the server. In practice though, this file seems to be published too.)
Instead of setting the connection strings in appsettings, all database connections should be stored in a secret. A local one (SQL Server Database configuration) for development, and an online one (Azure SQL Database configuration) for production.
They can be used the same as a connection string saved in appsettings by adding this to the startup class:
services.AddDbContext<AppDbContext>(options =>
  options.UseSqlServer(Configuration.GetConnectionString("DefaultConnection")), ServiceLifetime.Transient);
To enable the app to distinguish between the local database and the production one, I followed the Microsoft docs (finally useful for something…) found here.
Here is the final code:
public Startup(IConfiguration configuration, IWebHostEnvironment env) {
      Configuration = configuration;
      _env = env;
    }

    public IConfiguration Configuration { get; }
    private readonly IWebHostEnvironment _env;

    public void ConfigureServices(IServiceCollection services) {
      if (_env.IsDevelopment()) {
        services.AddDbContext<AppDbContext>(options =>
          options.UseSqlServer(Configuration.GetConnectionString("Local")), ServiceLifetime.Transient);
      } else {
        services.AddDbContext<AppDbContext>(options =>
          options.UseSqlServer(Configuration.GetConnectionString("Live")), ServiceLifetime.Transient);
      }

      // Rest of code removed for brevity...

}

    public async void Configure(IApplicationBuilder app) {
      if (_env.IsDevelopment()) {
        app.UseDeveloperExceptionPage();
      } else {
        app.UseExceptionHandler("/Error");
        app.UseHsts();
      }

      // Rest of code removed for brevity...

}
You inject the IWebHostEnvironment into the constructor instead of the Configure method. Then you can use that to decide which connection to use depending on what environment it is in.
In part 3 we’ll take a look at deploying the site to Azure.