
The following procedure shows how to configure Thunderbird to send email through Amazon SES. If you are using a different email client, the specific procedures are different, but the concepts and settings are the same.
Disclaimer
This post originates from an AmazonSES doc which no longer exists.
Note
The following procedure helps you set up an email client to send email using Amazon SES. However, you cannot use these clients to receive email sent to the email addresses you use with Amazon SES.
For more information about receiving email in Amazon SES, see Receiving Email with Amazon SES.
Configuring Mozilla Thunderbird to Send Email Using Amazon SES
These procedures were tested using Mozilla Thunderbird version 52.5 on Windows, macOS and Linux. The procedures may differ slightly for other versions of Thunderbird.
Part 1: Create Local Folders
Amazon SES does not include server-based folders in which you can save items such as sent mail and drafts. For this reason, you must create these folders on your computer. You will configure Thunderbird to save mail to these folders in Part 3: Configure Thunderbird to Save Sent Mail and Drafts on Your Computer.
To create the Sent Mail and Drafts folders
- In the bottom left corner of the Thunderbird window, click the Offline Mode (
 ) icon to enable offline mode. If Thunderbird asks if you want to download messages for offline use, choose Later.
 - In the navigation pane on the left side of the Thunderbird window, right-click a blank area, and then choose New Folder.
- On the New Folder window, complete the following sections:
- For Name, type
Sent Mail. - For Create as a subfolder of, choose Local Folders.
- For Name, type
- Repeat steps 2 and 3 to create an additional folder, but this time, name the folder
Drafts.
Part 2: Configure the SMTP Server
Before you can send email through Amazon SES, you must configure Thunderbird to connect to the Amazon SES SMTP endpoint.
To configure the SMTP server
- In Thunderbird, complete one of the following steps:
- If you use Windows: choose the Menu (
 ) icon, point to Options, and then choose Account Settings.
 - If you use Linux or macOS: choose the Menu ( ) icon, point to Preferences, and then choose Account Settings.
- If you use Windows: choose the Menu (
- On the Account Settings window, in the column on the left, choose Outgoing Server (SMTP).
- Choose Add.
- On the SMTP Server window, complete the following sections:
- For Description, type
Amazon SES. - For Server Name, enter the SMTP endpoint for the AWS Region in which you use Amazon SES. For a list of endpoints, see Email Sending Endpoints.
- For Port, type
587. - For Connection security, choose STARTTLS.
- For Authentication method, choose Normal password.
- For User Name, type your SMTP user name.
NoteYour SMTP user name is not the same as your AWS access key ID. For more information, see Obtaining Your Amazon SES SMTP Credentials.When you finish, choose OK. - For Description, type
- On the Account Settings window, choose Account Actions, and then choose Add Mail Account.
- On the Mail Account Setup window, complete the following sections:
- For Your name, type the name you want to appear on messages sent from this account.
- For Email address, type the email address you use to send email with Amazon SES.
- Leave the Password field blank, and clear the check box next to Remember password.
When you finish, choose Advanced config. You will return to the Account Settings window.NoteYou can only complete this step if Thunderbird is in Offline Mode. - On the Account Settings window, in the column on the left, choose the account you created in the previous step.
- For Outgoing Server (SMTP), choose the SMTP server you created in step 8.
Part 3: Configure Thunderbird to Save Sent Mail and Drafts on Your Computer
In this section, you will find procedures for saving sent mail and drafts to your computer.
To configure Thunderbird to save sent mail and drafts to your computer
- On the Account Settings window, under your account, choose Server Settings.
- Under Server Settings, clear the check boxes next to the following items:
- Check for new messages at startup
- Check for new messages every 10 minutes
- Allow immediate server notifications when new messages arrive
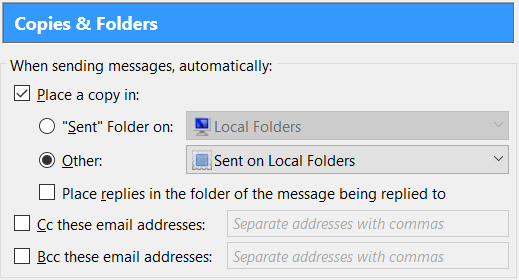
- On the Account Settings window, under your account, choose Copies & Folders.
- Under When sending messages, automatically, choose Other, and then choose the Sent Mail folder you created in step 3.
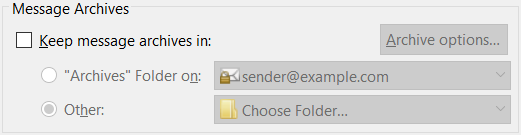
- Under Message Archives, clear the check box next to Keep message archives in.
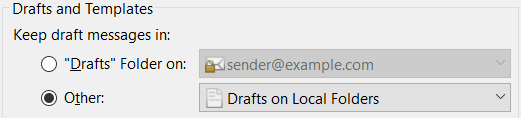
- Under Drafts and Templates, choose Other, and then choose the Drafts folder you created in step 4.
Part 4: Test Email Sending Functionality
Complete the procedures in this section to ensure that Thunderbird is properly configured to send email through Amazon SES.
To test email sending in Thunderbird
- In the bottom left corner of the screen, choose the Offline mode (
 ) icon to disable offline mode.
 - On the Thunderbird window, choose Write. Send a test message to yourself, or to another email address that has been verified with Amazon SES..
- When you send the email, you may be prompted to enter a password. Enter your Amazon SES SMTP password, and then select the box next to Use Password Manager to remember this password.
NoteYour SMTP password is not the same as your AWS access key ID. For more information, see Obtaining Your Amazon SES SMTP Credentials.The first time you send an email using this configuration, Thunderbird may display a message stating that it was unable to connect to the server. If this message appears, click Retry.
(Optional) Part 5: Specify a Configuration Set When Sending Email
You can configure Thunderbird so that it allows you to specify a configuration set when you send a new message.
Warning
You modify the hidden configuration settings in Thunderbird during this procedure. Changing these settings may render Thunderbird unusable. Proceed with caution.
To add a configuration set header
- In Thunderbird, choose the Menu ( ) icon, point to Options, and then choose Options.
- On the Options window, choose Advanced. On the General tab, choose Config Editor.
- On the about:config window, right-click anywhere in the list of configuration settings, point to New, and then choose String.
- For Enter the preference name, type
mail.compose.other.header, and then choose OK. - For mail.compose.other.header, type
X-SES-CONFIGURATION-SET, and then choose OK. - Close the about:config window, and then close the Options window.
- When you send an email, type the recipient’s address in the To field. Click the blank line below the recipient’s email address. Click the To menu, and then choose X-SES-CONFIGURATION-SET.
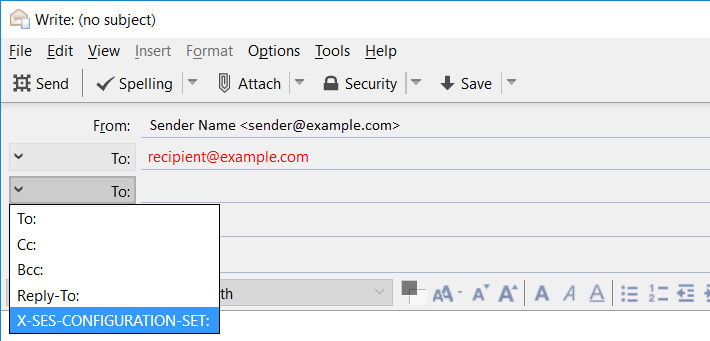
- On the X-SES-CONFIGURATION-SET line, type the name of the configuration set you want to use. Complete the remaining sections of the email as you normally would.
Excellent thanks a lot