
PWAs (Progressive Web Apps) are becoming a thing. They enable you to install the app as a local program / app, with their own icon in the taskbar and can be launched from the start menu. Let’s discuss a few reasons why PWAs are the right way to go forward.
PWAs are powerful, effective, fast and app-like. The improved speed, and the easiness that requires no installation or updates makes PWAs a developers choice. Development cost is drastically reduced since there is no need to create a mobile app. Native mobile apps need ratings to get them to show up in searches in the app store, you probably already have SEO working for your website so no more is needed. Sharing a link to a website is far easier than giving the name of the app for the user to try and find on their own. They have offline support, and can send push notifications if the user allows.
Whilst there are still some drawbacks with PWAs over native apps, mainly due to Apple’s lag in supporting them. They’re definitely the way to go for a lot of businesses.
For further reading here is a great more in depth article Will PWAs replace native mobile apps on the subject.
If you’re creating a Blazor Client Side app, there is a default option to make it a PWA.
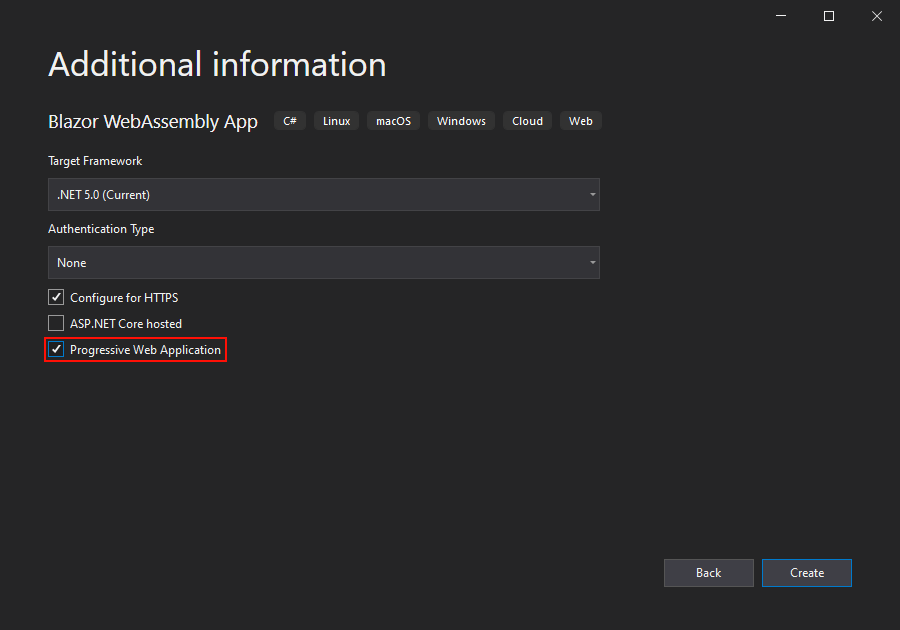
However when building other websites there is no inbuilt option to make it PWA. To take advantage of PWA it can be added manually. In this tutorial I’m adding it to a Blazor Server Side app.
First, add a service-worker.js and a manifest.json to the wwwroot folder. The service-worker is where all the magic happens. The manifest.json is the configuration file and holds all the customisation for the app like the theme colour etc.
Note:
These files should be directly in the root folder and not in a sub folder.
Now you need to register the service-worker in the _Host.cshtml (or _Layout.cshtml) file by adding this line before the end of the body:
<script>navigator.serviceWorker.register('service-worker.js');</script>
You will also need to link the manifest file so add this to the header:
<link href="manifest.json" rel="manifest" />
Next we need to add the code to the service-worker for it to do the job:
const cacheNamePrefix = 'offline-cache-';
const version = 'WS0yDzH4';
const cacheName = `${cacheNamePrefix}${version}`;
const offlineUrl = "offline.html";

self.addEventListener("install", (event) => {
	event.waitUntil(
		(async () => {
			const cache = await caches.open(cacheName);
			await cache.add(new Request(offlineUrl, { cache: "reload" }));
		})()
	);
});

self.addEventListener("activate", (event) => {
	event.waitUntil(
		(async () => {
			if ("navigationPreload" in self.registration) {
				await self.registration.navigationPreload.enable();
			}
		})()
	);

	self.clients.claim();
});

self.addEventListener("fetch", (event) => {
	if (event.request.mode === "navigate") {
		event.respondWith(
			(async () => {
				try {
					const preloadResponse = await event.preloadResponse;
					if (preloadResponse) {
						return preloadResponse;
					}

					const networkResponse = await fetch(event.request);
					return networkResponse;
				} catch (error) {
					console.log("Fetch failed; returning offline page instead.", error);
					const cache = await caches.open(cacheName);
					const cachedResponse = await cache.match(offlineUrl);
					return cachedResponse;
				}
			})()
		);
	}
});
Lets break it down and see what’s happening:
- At the top of the file we declare a few
const‘s, we add a version number to the cache name so that the worker knows if the file has been updated by comparing the version. - We add a
constwith the url to a file namedoffline.html. This is a file we’ll add later which will be served up if we can’t connect to the server. - There are then 3 event listeners declared:
- One for when the app is installed, this creates a cache with the name defined and adds the
offline.htmlto the cache. - Check if the browser supports navigation preload and enable if it does. More info about what this does can be found here.
- The third event listener handles the actual request (the
fetch), this is where we try and connect with the server, and respond accordingly. If we can connect we send back the page, otherwise we load theofflinefrom the cache.
- One for when the app is installed, this creates a cache with the name defined and adds the
We need to edit the manifest.json file with some basic configuration:
{
  "name": "Server PWA Solution",
  "short_name": "PWA Solution",
  "start_url": "./",
  "display": "standalone",
  "background_color": "#ffffff",
  "theme_color": "#3B3B3B",
  "icons": [
    {
      "src": "icon-512.png",
      "type": "image/png",
      "sizes": "512x512",
      "purpose": "any maskable"
    }
  ]
}
Change the name and short name to the name of your application. Add an icon that is 512 pixels (height & width) to the wwwroot folder and set line 10 with the link to it. Link the icon in the _Host.cshtml or _Layout.cshtml page:
<link rel="apple-touch-icon" sizes="512x512" href="icon-512.png" />
Finally add an offline.html page to the root folder. This file will be shown when the user is offline, so give a nice message maybe with a reload button.
Remember:
Any styles or JavaScript has to be in this file, since no other file is being drawn from the cache.
Now we can run the app, and you should see the install icon in the search bar.
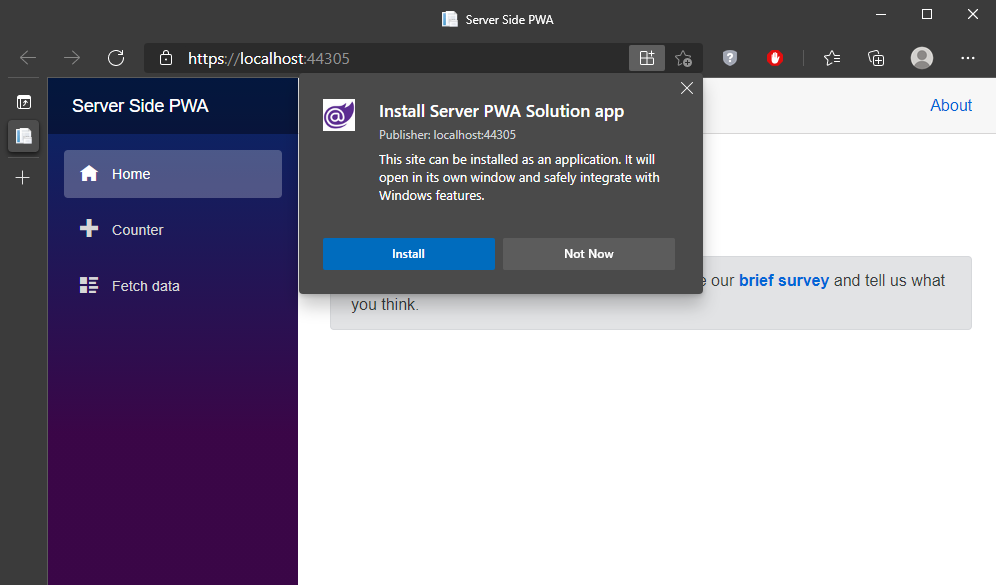
Click the icon and install. You can now find the installed app in your start menu and has it’s own icon in the taskbar.
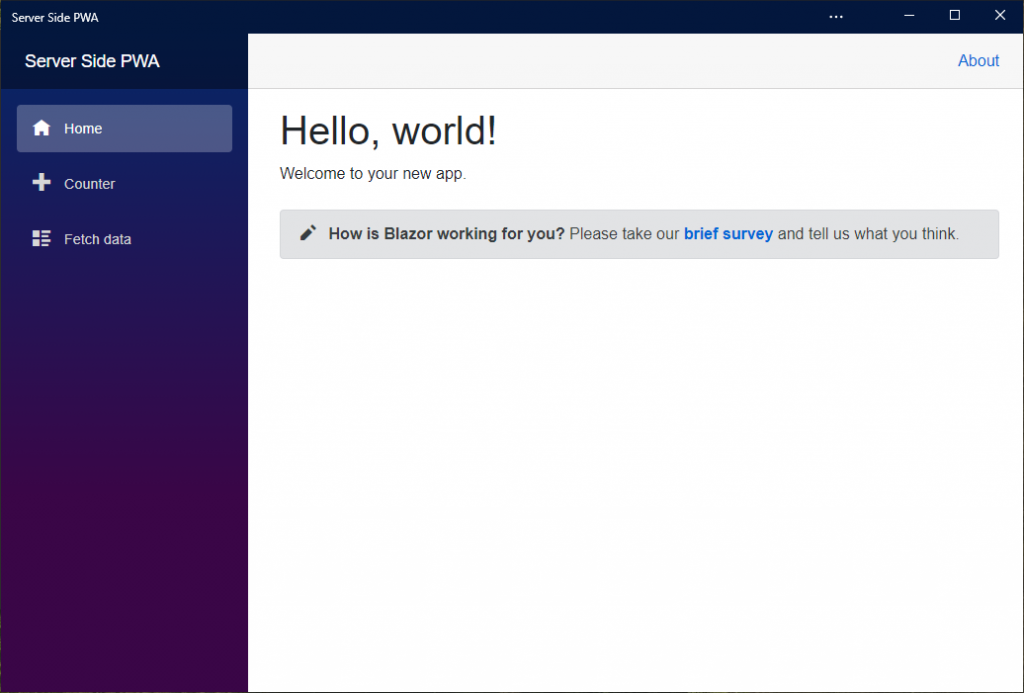
We have now successfully added PWA support to our app.
When editing the service-worker or the manifest.json files, when finishing make sure to increment the version number in the service-worker, this will ensure the browser detects that the file has been updated.
One slight glitch with edits are; the updated version is not implemented until all instances of the app have been closed. Reloading the page is not enough.
Starting in August 2021 both Edge and Chrome will not support PWAs that don’t implement an offline management. Only apps that fulfil all core Progressive Web App installability criteria, including support for an offline mode, can be installed as a PWA. Offline management is checked by simulating the fetch event handler, and validating if it returned a valid resource with HTTP 200 during the check. Therefore we always need to make sure we return something, in this post we have successfully done it by adding an offline.html file that will be served in-cases of no connection.